Comtarsia SignOn Proxy 7.0
Table of Contents
The Comtarsia SignOn Proxy is the central authentication instance in the Comtarsia product portfolio.
Main features:
- LDAP authentication and custom authentication modules
- Authentication caching
- MFA server for TOTP, HOTP, TOTP cloud push service, FIDO2 and Smart Cards
- Forwarding of authentication requests to agent system (Comtarsia SignOn Agents)
- Gateway functionality (can act as LDAP server. RADIUS server)
- Provides an extensive REST API for easy integration
The SignOn Proxy is available for Windows servers as well as for different Linux distributions.
The SignOn Proxy acts as an authentication middleware for different clients:
- Comtarsia Logon Client (Windows and Linux)
- Generic LDAP clients
- Generic RADIUS clients (e.g. network switches, pam_radius,...)
- Web applications using the REST API
1. Installation
The SignOn Proxy 7.0 can be installed on WIndows servers and variuos Linux distributions.
1.1 Installing on Windows
System requirements
The SignOn Proxy 7.0 for Windows supports Windows Server 2016, 2019, 2022 and 2025. An installation using the SignOn Solutions 7.0 bundle installer requires a Windows GUI installation. Windows CMD only is partially supported by directly installing via MSI.
Installing with the bundle installer
To install, execute the SOS70-7.0.X.1.exe. Select the feature "SignOn Proxy NC" and lick install. This will install the SignOn Proxy service as well as the Web Management service.
A shortcut to the Windows Start Menu is added, whoch will open your default browser and go to the page
http://localhost:5002/
Installing from MSI
Directly installing the MSI packages is useful mostly for software distribution scenarios. To get the MSI files, run the SignOn Solutions bundle installer SOS70-7.0.X.1.exe. On the feature selection page, there is a "Export MSI" that will allow the export of all MSI packages and the corresponding evaluation license keys to a folder.
The SignOn Proxy and the Web Management are 2 different MSI packages. If the Web Management is not required on a computer, the SignOn Proxy can be installed stand-alone. The Web Management on the other hand always needs a local SignOn Proxy installed, because it relies on parts of the SignOn Proxy configuration.
File system structure on Windows
The installation creates the folder C:\Program Files\Comtarsia\SignOn Solutions 7.0 with the following directory structure below:
| Verzeichnis | Beschreibung |
|---|---|
bin |
The SignOn Proxy and Web Management binaries |
cert |
All TLS certificates that are used in the different SignOn Solutions components. |
db |
This directory contains all internal SignOn Proxy databases, e.g. for caching. |
key |
Contains the license keys for the different components. |
log |
All log files are created here by default. |
wwwroot |
Contains the HTML/JavaScript files for the Web Management and Enrolment frontend. |
1.2 Installing on Linux
The SignOn Solutions 7.0 are provided in different packages for various distributions. Currently available are packages for RedHat Enterprise Linux 8, Ubuntu 24 and AlmaLinux 9. If you require an installer for another distribution, feel free to contact us.
Installing onRedhat RHEL 8
The SignOn Solutions containing the SignOn Proxy and the Web Management are delivered as a RPM package, which can be installed with this command:
rpm -i sos70-X.22-1.x86_64.rpm
To optionally verify the signature of the RPM package, first import the Comtarsia GPG key:
rpm --import comtarsia.asc
Afterwards, the signature can be verified with:
rpm --checksig -v sos70-X.22-1.x86_64.rpm
This should give an output similar to:
sos70-X.22-1.x86_64.rpm:
Header V4 RSA/SHA256 Signature, key ID 37733a12: OK
Header SHA256 digest: OK
Header SHA1 digest: OK
Payload SHA256 digest: OK
MD5 digest: OK
Installing on Ubuntu 24
The SignOn Solutions containing the SignOn Proxy and the Web Management are delivered as a deb package, which can be installed with this command:
dpkg -i sos70-X.21-1.x86_64.deb
Installing on AlmaLinux 9
The SignOn Proxy is delivered as a RPM package, which can be installed with this command:
rpm -i sos70-X.20-1.x86_64.rpm
To optionally verify the signature of the RPM package, first import the Comtarsia GPG key:
rpm --import comtarsia.asc
Afterwards, the signature can be verified with:
rpm --checksig -v sos70-X.20-1.x86_64.rpm
This should give an output similar to:
sos70-X.20-1.x86_64.rpm:
Header V4 RSA/SHA256 Signature, key ID 37733a12: OK
Header SHA256 digest: OK
Header SHA1 digest: OK
Payload SHA256 digest: OK
MD5 digest: OK
Update on AlmaLinux 9
To perform an update of an installed SignOn Proxy for Linux installation, use the following command:
rpm -Uvh sos70-X.20-1.x86_64.rpm
FileSystem structure on Linux
| Directory | Description |
|---|---|
bin |
The SignOn Proxy and Web Management binaries |
cert |
All TLS certificates that are used in the different SignOn Proxy components. |
conf |
All configuration values are stored in the configuration file sosprofiles.conf. and XXXXX located. |
db |
This directory contains all internal SignOn Proxy databases, e.g. for caching. |
install |
This folder create scripts to register the SignOn Proxy/Web Management service and to install the required firewalld exceptions. |
key |
Contains the license keys for the different components. |
log |
All log files are created here by default. |
wwwroot |
Contains the HTML/JavaScript files for the Web Management and Enrolment frontend. |
2. Configuration
The primary way to configure the Comtarsia SignOn Proxy is via the Web Management web service. Using the web service will help to follow configuration constraints and avoid configuration mistakes.
In special cases, e.g. when using software distribution, the configuration can be set via:
- Windows: Registry HKEY_LOCAL_MACHINE\SOFTWARE\Comtarsia
- Linux: sosprofiles.conf under /usr/local/sos70/conf
Take extra care when modifying the configuration manually, as small mistakes can render a working configuration unusable.
2.1 Web Management Login
After installing the SignOn Proxy the Web Management service listener is active on port 5002 for HTTP requests and port 5003 for HTTPS requests. Open a browser and go to the URL http://localhost:5002/. This URL can also be accessed remotely by default. Remote access and HTTPS access can be controlled in the Web Management settings on the Settings page after login.
Connecting with a browser will present the login page:
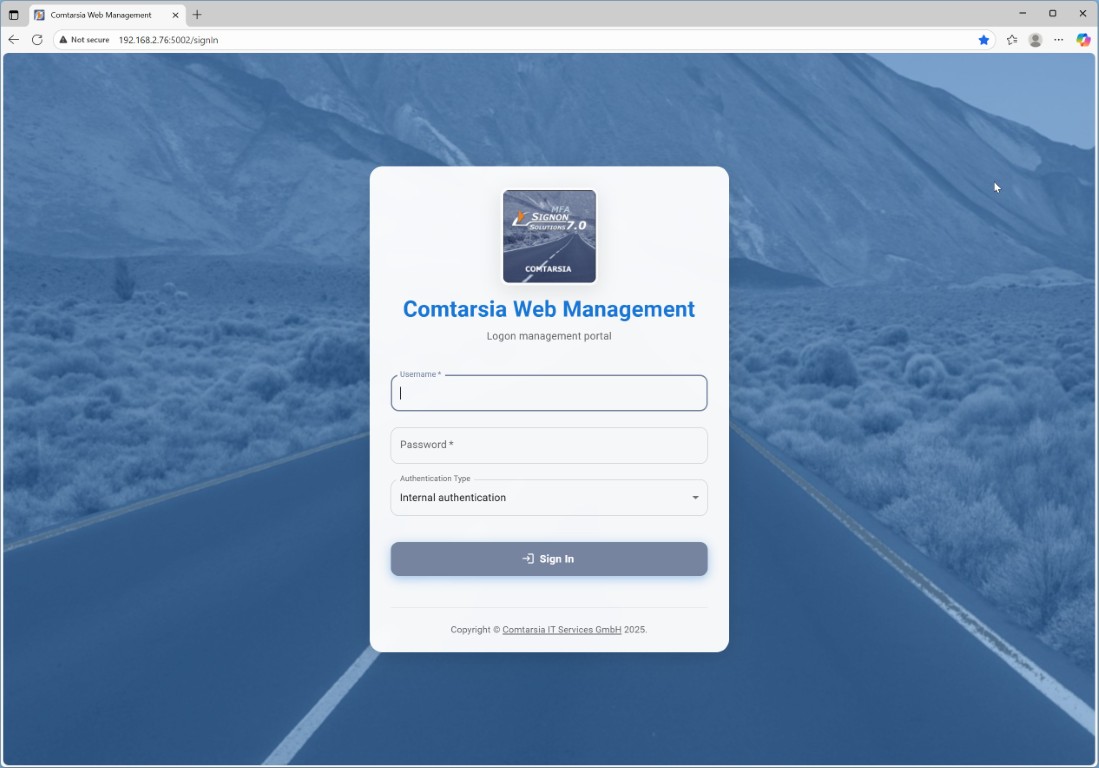
The Web Management supports 3 types of user authentication:
- Windows authentication: Default on Windows systems, not available under Linux
- Internal authentication: Default under Linux. The default username is "admin", the default password is also "admin". These values can be changed later on the Web Management settings page.
- SignOn Proxy authentication: Can use LDAP or any other configured auth module. Requires a full functioning SignOn Proxy configuration and user to be a member of the configured proxy authentication group.
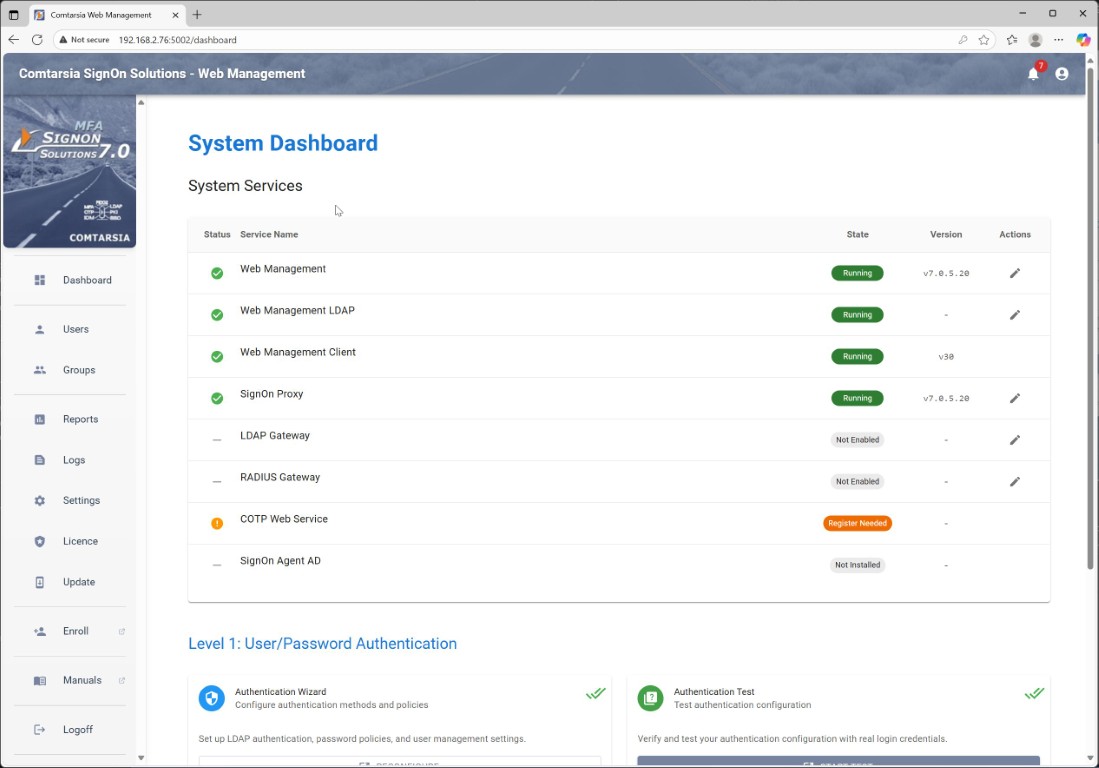
After logging in, you are presented a dashboard showing the status of all Comtarsia services. On the top right is a notification icon which will show important service notifications.
2.2 Settings
Under the Settings menu point, all configuration options from all supported Comtarsia SignOn Solution products are shown. Currently supported by the Web Management is the SignOn Proxy and the SignOn Agents. Other products like the Comtarsia Logon Client have their own management app.
On the Settings main page the status of all services is shown together with a list of all configuration profiles.
Different products/sub-products of the SignOn Solutions use their own profile numbers. Most products support more than one configuration profile which is not needed in most cases. This would allow special configurations like having multiple LDAP servers which are switched based e.g. on the location of the client.
| Profile number | Product |
|---|---|
| 121 | LDAP Gateway |
| 141 | RADIUS Gateway |
| 401-409 | SignOn Agent for Active Directory |
| 501-509 | SignOn Proxy |
Beside each config value there is an info icons that will show a description for this value together with its default value. The configuration value names can have one of three colors:
- Grey: This config value is still its default value.
- Light blue: This config value is changed from the default value.
- Dark blue: This config value is still its default value but it is set in the config. Setting a value actively to its default value is normally not needed and can be cleaned up be checking the "Cleanup all default values on apply" checkbox at the bottom of the page.
This config value color schema makes it easy to spot values that are actually set.
SignOn Proxy settings
The SignOn proxy settings are split over multiple tabs:
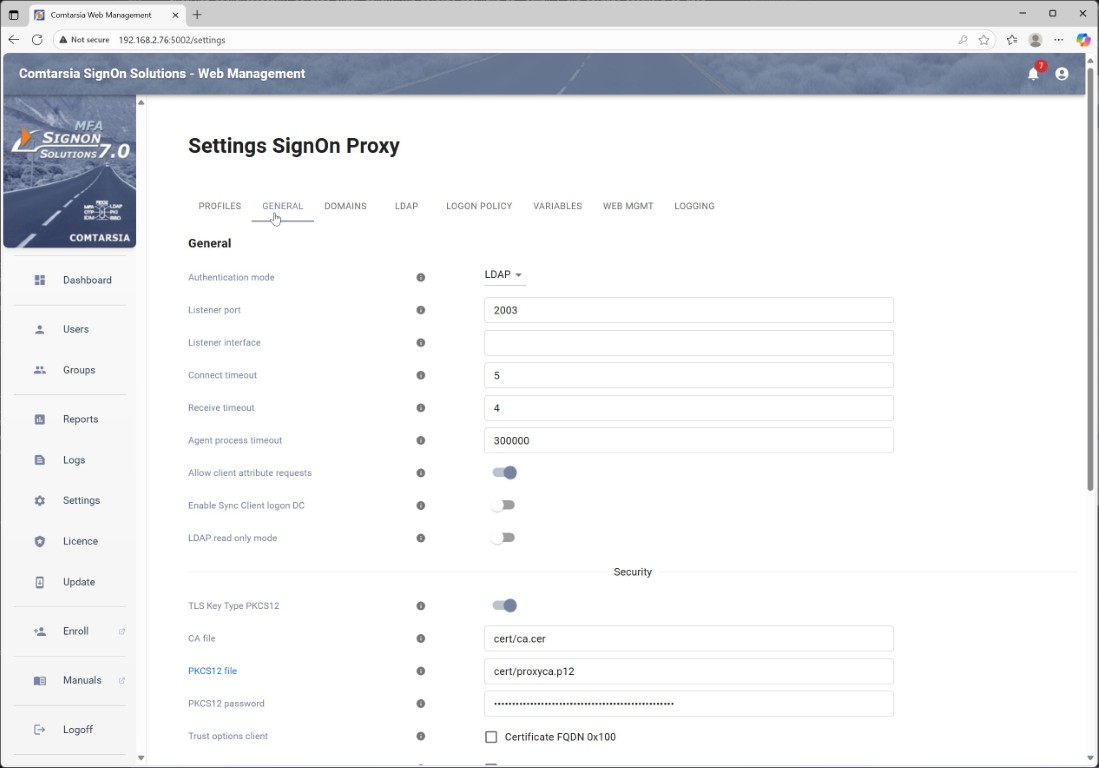
- General: This tab contains mostly global configuration values like the authentication mode (LDAP, AD, custom auth package), listener settings inclusive the TLS configuration as well as settings to enable/disable the different gateway modes like LDAP Gateway or RADIUS Gateway.
- Domains: The domains tab allows for the configuration of one or more SignOn Agent servers that will receive user login information and are used to synchronize the users to this target systems.
- LDAP/AD: These tabs are used to configure the primary authentication system.
- Logon Policy: Configures system policies related to usernames and passwords. Allows to enable the different OTP (TOTP, HOTP, COTP, FIDO2) types.
- Variables: This tab is the variable manager that is used to send user attributes between the different SignOn Solution components. E.g. can be used to send group membership information or user attributes to a SignOn Agent or the Logon Client. The variable manager is a powerful tool that can modify and create variables based on different rules via regular expressions.
- Web Mgmt: These are the settings for the web management service which are described in more detail in the next section. These settings are included in the SignOn Proxy settings as the SignOn Proxy and the Web Management share many settings.
- Logging: All logging related settings. Allows logging to a file and also to syslog. Supports the configuration fo different log levels and log details.
Web Management settings
The Web Management settings consist mostly of values to configure the HTTP/HTTPS listener and the available authentication methods for the admin logon to the Web Management. After installation, the Web Management running on Windows Server performs a Windows authentication for members of the Administrators group. The Web Management under Linux defaults to an internal authentication (admin/admin) that should be changed here after the first login. After configuring the LDAP/AD configuration on the SignOn Proxy, this can be also used for Web Management authentication.
3. Multi-Factor Authentication
The Comtarsia Logon Client supports different Multi-Factor Authentication (MFA) types to be used as a second factor for user authentication. These are:
- TOTP, an industry-standard Time-based OTP, defined in RFC 6238
- HOTP, a standardized counter-based OTP, defined in RFC 4226
- FIDO2 are mostly USB security keys, a standard defined by the FIDO Alliance
- COTP, a Comtarsia developed push notification OTP using the Comtarsia Authenticator App for Android or iOS, compatible with the TOTP standard
Normally, users are just using their passwords to authenticate themselves. Passwords have some well-known drawbacks; some may be easy to guess, an attacker may be able to watch the user entering the password and so on. Therefore, adding a second factor to the authentication process will significantly improve system security. Before following this guide you must have an already working Logon Client and SignOn Proxy Installation with your backend of choice (LDAP or AD), where users can authenticate using user and password. Information about the enrolled MFA device and the last logon status needs to be stored for every user. This information can be saved into a user attribute in the LDAP/AD directory or the SignOn Proxy integrated database can be used for this. If a user must use an MFA device for authentication is controlled using group memberships. Every LDAP/AD group can be extended with an attribute that contains this information, or alternatively, the SignOn Proxy integrated database can be used. The SignOn Proxy integrated database is the easiest to use, on the other hand, storing the MFA information in the directory has advantages when you have multiple directory servers, as the replication is then handled the standard LDAP/AD way.
3.1 MFA types in detail
TOTP and HOTP
TOTP is a time-based OTP standard. HOTP is an index-based OTP standard. As an OTP device, authenticator apps on mobile devices can be used. On enrolment, the Comtarsia Logon Client displays a QR code, which the user subsequently scans with the authenticator app. The Comtarsia Authenticator App for Android and iOS can be used for this, but also other authenticators that support TOTP will work. As an alternative to the authenticator apps, OTP tokens can be used. Such devices cannot be self-enrolled by the user and therefore, they must be assigned to a user before they are handed out. Details of this process are not covered in this guide and can be obtained by request from Comtarsia. After the enrolment, if the user wants to log in, he enters his username and password as usual, but he adds the OTP generated by the authenticator app after the password.
FIDO2
FIDO2 is a standard for security keys often with a USB interface. These devices can store credentials for multiple services and applications. To use them, the user must connect them to a USB port and give his consent by pressing a button on the token or sometimes even touching a fingerprint sensor on the token. To enroll, the Logon Client asks the user to connect his token and give his consent. The FIDO2 standard supports two different types of credentials; resident keys and non-resident keys. With resident keys, the credentials are stored on the token, which is why one token can only support a limited number of different credentials. Using no resident keys, the credentials are not stored in token; instead, they are stored by the SignOn Proxy in the LDAP/AD directory or the integrated dataset. If the users should be able to use the FIDO2 token also for offline-logon, a resident key must be used. This can be configured in the Group view of the Web Management.
COTP
The Comtarsia developed COTP uses a time-based OTP as a second factor, which is transmitted securely in the background through the use of the Comtarsia Authenticator App and the Comatrsia Cloud Service. When a user wants to log in, he first enters his username and password as usual. On checking the credentials, the Comtarsia SignOn Proxy sees that for this user a second factor is required and sends a push notification request through the Comtarsia Cloud Service to the Comtarsia Authenticator App running on the mobile of the user. This Authenticator app then displays a popup, asking the user if he wants to log in to the workstation. The user can confirm this using his configured biometric authentication on the mobile. On successful authentication, the app sends back a secure message to the SignOn Proxy, which then allows the user to login.
The enrolment of COTP simply works by scanning a QR code with the Comtarsia Authenticator app.
Account Session Password The Account Session Password (ASP) is a functionality that can be enabled for users in addition to the MFA login. It replaces the user password in the directory with a generated password based on a hash of the user password concatenated with configured “SessionPasswordKey” on the SignOn Proxy. This hash is then used to create a password as defined by the “AuthSessionPasswordTemplate” rule. The ASP functionality is useful to deny users to logon directly to the LDAP/AD directory without using the Comtarsia Logon Client.
3.2 The Comtarsia MFA Cloud Service
The Comtarsia MFA cloud service is hosted service running in the Microsoft Azure cloud. This web service has the purpose to bridge the connection between SignOn Proxy and the Comtarsia Authenticator app running on a mobile device. It supports sending push notifications to Android and iOS devices. The MFA cloud services don’t need to be configured manually, the SignOn Proxy automatically connects to the web service and performs the necessary configuration automatically in the background. The communication between the Authenticator App and the SignOn Proxy is end-to-end encrypted. The MFA Cloud Service just routes the messages between these two parties and is not able to see any sensitive information. The MFA cloud service is reachable at the address “mws.comtarsia.com” on port 443 (HTTPS), so this address must be reachable from the SignOn Proxy as well as from all mobile devices running the Comtarsia Authenticator App. The sending of push notifications to the authenticator app is done on Android using Google Firebase Cloud Messaging and on iOS using the Apple Push Notification Service. For special projects, Comtarsia can deliver a version of the cloud service that can be installed in the customer's own cloud. Contact us for further information.
3.3 The Comtarsia Authenticator App
The Comtarsia Authenticator App is available for Android devices using at least Android version 6.0 and Apple iOS devices using iOS version XX or higher. The Android version can be downloaded from the Play Store under this URL: https://play.google.com/store/apps/details?id=com.comtarsia.comtauthenticatorapp The iOS version is available directly from Comtarsia on request. The Comtarsia Authenticator App supports TOTP, HOTP and the Comtarsia developed COTP protocols. This means that besides using it with the Comtarsia SignOn Solutions, the Authenticator can also be used with most web sites that support two-factor authentication like Microsoft, Amazon and so on. New credentials can be added by scanning a QR code or by manually entering the credential details. The app requires permission to use the camera to be able to scan QR codes that are used for enrolment. Furthermore, the app needs access to the Internet to check for updates and, if the user is enrolled in COTP, to communicate with the Comtarsia Cloud Service.
3.4 MFA Configuration
All configuration can be done via the Web Management. For details see the Comtarsia SignOn Solutions MFA Guide.
4. LDAP Gateway
The choice of LDAP Gateway mode depends on the reason on why to use the LDAP Gateway. In standalone mode, all data is retrieved from the SignOn Proxy. This is useful, when the primary authentication system is not LDAP, if user attributes needs to be modified/added on the SignOn Proxy, or if the SignOn Proxy Caching functionality should be used. The passthrough mode intercepts only LDAP bind requests and sends them to the SignOn Proxy. All other LDAP requests are forwarded directly to the configured LDAP server. This mode is useful if the SignOn Proxy is used as an OTP/MFA engine. Passthrough mode The following screenshots show an example configuration of the LDAP Gateway in passthrough mode that works for pam and nss LDAP under Linux:
On the general page, the mode must be set to passthrough, the SignOn Proxy primary host gets set to the IP/Hostname of the SignOn Proxy. Optionally, the BaseDN can be set for clients to be able to query the BaseDN.
On the Listener page, the LDAP and LDAPS mode should be enabled.
On the forwarder page, the IP/Hostname of the LDAP server should be entered. SSL mode and port can be configured as needed. Under ExcludeDN, the system user BindDN, used on the Linux system should be added. This excludes this DN from authenticating via the SignOn Proxy, which is normally not needed for system accounts and offers performance advantages.
4.1 Example use-case: Authenticating a Linux system user
Basically, for a user to authenticate on a Linux system, two points needs t be fulfilled. A PAM module must be able to authenticate the user an furthermore, the system must be able to get user and group information for the user. This means that if a user is existent in the local users database (/etc/passwd), then it is enough to configure the PAM module. If also the user and eventually group information should come from the LDAP, then additionally, the nsswitch has to be configured accordingly.
Ubuntu 20.04 LTS
The file “/etc/ldap.conf” holds the system wide LDAP configuration. The core parameters are “uri”, which defines the LDAP host, port address and protocol (LDAP or LDAPS). The parameter “base” sets the Base DN to be used. “rootbinddn” defines an system user that is used to query for users and groups. The password for this system user must be set in the file “/etc/ldap.secret”. An example configuration: /etc/ldap.conf: base o=gsoc uri ldap://192.168.2.97:389/ rootbinddn cn=Directory Manager
/etc/ldap.secret: PASSWORD
Nsswitch configuration: The nsswitch configuration is done in the file “/etc/nsswitch.conf”. Here it is defined which sources the system should use to gather user or group information. By default, the entry “files” is used, which means that user information comes from “/etc/passwd” and group information comes from “/etc/group”. By appending “ldap” in the corresponding lines, also the LDAP server will be queried from information. Example entry from /etc/nsswitch.conf: passwd: files systemd ldap
At this point, the a first test of the configuration can be done using the “getent” tool. The command “getent passwd” shows information for all user, from the local passwd file and from LDAP. If there are users configured in LDAP, they must show up here, otherwise the configuration is not correctly working. With “getent group” the group information from the groups file and the LDAP serve can be retrieved. LDAP groups must show up here. PAM configuration It is important to be careful here to not lock yourself out of the system. It is recommended to try the PAM settings out for one application like login. If everything works, the same settings can be defined for other applications later on. PAM configuration is a complex topic and this chapter will not explain all the details. The Linux journal has a good article explaining the basics of PAM under https://www.linuxjournal.com/article/2120. For example, to make the login tool use LDAP authentication, the following PAM configuration can be used: /etc/pam.d/login: auth sufficient pam_ldap.so auth required pam_unix.so use_first_pass nullok_secure
Now the configuration can be tried out by running „login“ from the command line and entering a LDAP username and password. If everything works well, the user will be able to login.
CentOS 7 with nss-pam-ldap and authconfig
Required modues and configuration Install required modules: yum install nss-pam-ldapd nscd Add the LDAP configuration to the nslcd config file (/etc/nslcd.conf), for a minimum configuration, set the following parameters: uri ldap://192.168.2.122/ base dc=comtarsia,dc=com binddn cn=admin,dc=comtarsia,dc=com bindpw PASSWORD
Create a home dir for the LDAP user: mkdir /home/suser2 chown 5000:5000 /home/suser2
Enable LDAP config with autoconf: authconfig --updateall --enableldap --enableldapauth Disable LDAP config with autoconf (e.g. in case of problems): authconfig --updateall --disableldap --disableldapauth
Enable and restart the nslcd: systemctl enable nslcd systemctl restart nslcd
Testing First check with a ls to the home directory. If the uid and gid numbers are resolved correctly as specified in the according LDAP objects, the LDAP communication is working correctly: [root@localhost stefan]# ls -l /home drwxr-xr-x. 2 suser2 pgroup1 6 Mar 30 09:13 suser2
In this example the LDAP communication failed, the Linux system only shows the uid and gid numbers: [root@localhost stefan]# ls -l /home drwxr-xr-x. 2 5000 5000 6 Mar 30 09:13 suser2
In the case of problems, the /var/log/messages and /var/log/secure can provide further information. Also the LDAP Gateway log will show which type of queries took place. As an additional test, the tool getent can be used to display all user and group information. If the LDAP connection is working properly, this will show a combined output of the local users and the LDAP users respective groups: getent passwd getent group
TLS Support To use a TLS connection to the LDAP Gateway, the CA certificate of the LDAP Gateway must reside on the local file system. Afterwards, a few changes have to be made to the /etc/nslcd.conf file: uri ldaps://FQDN_of_the_LDAP_Gateway/ The uri must start with ldaps and contain the FQDN of the LDAP Gateway server. This FQDN must also be the subject of the server certificate. Using OpenSSL, the server’s CA certificate can be viewed: openssl s_client -connect IP/HOSTNAME:636 -showcerts
tls_cacertfile /usr/ca10.pem This should point to the CA certificate used to issue the server certificate.
Then the config change can be applied with: authconfig --updateall --enableldap –enableldapauth and the nslcd daemon can be restarted with: systemctl restart nslcd
Now the above mentioned test can be made again, all the communication between Linux and the LDAP Gateway will now be secured by the TLS protocol.
CentOS 8 with nss-pam-ldap and authselect Required modues and configuration Install required modules: yum install nss-pam-ldapd Add the LDAP configuration to the nslcd config file (/etc/nslcd.conf), for a minimum configuration, set the following parameters: uri ldap://192.168.2.122/ base dc=comtarsia,dc=com binddn cn=admin,dc=comtarsia,dc=com bindpw PASSWORD
CentOS 8 uses authselect instead of authconfig from CentOS7. It does not come with an authselect profile for nss-pam-ldap, so the easiest way is to copy the SSSD profile and modify it. Execute the following steps: cp -Rp /usr/share/authselect/default/sssd /etc/authselect/custom/nslcd cd /etc/authselect/custom/nslcd sed -i 's/sss/ldap/g' fingerprint-auth sed -i 's/sss/ldap/g' password-auth sed -i 's/sss/ldap/g' smartcard-auth sed -i 's/sss/ldap/g' system-auth sed -i 's/sss/ldap/g' nsswitch.conf sed -i 's/SSSD/NSLCD/g' REQUIREMENTS
Activate the newly created authselect profile: authselect select custom/nslcd –force
Now the LDAP connection should work, see the testing chapter for CentOS 7.
AlmaLinux 9.1
Required modues and configuration This guide uses the SSSD (System Security Service Daemon) for the connection to the LDAP. SSSD requires the use of LDAPS or STARTTLS, unencrypted LDAP will not work. Ensure that the LDAP server is ping-able by its FQDN, this is important for the certificate validation. For testing purposes, it’s also possible to make an entry to /etc/hosts. Further ensure that the FQDN of the LDAP server matches the certificate subject. An easy way to check the LDAPserver certificate is using openssl, e.g.: openssl s_client -connect ldapgw.comtarsia.com:636
Install required modules: dnf install openldap-clients sssd sssd-ldap oddjob-mkhomedir libsss_sudo
Use authselect to switch the authentication profile to the SSSD: authselect list authselect select sssd with-mkhomedir --force This will activate the PAM_LDAP, nsswitch over LDAP and the automatic homedir creation using pam_oddjob_mkhomedir. To start this service and verify that it is running use the following command: systemctl enable --now oddjobd.service systemctl status oddjobd.service
To configure SSSD, create a file /etc/sssd/sssd.conf with the following content: [domain/default] id_provider = ldap autofs_provider = ldap auth_provider = ldap chpass_provider = ldap ldap_uri = ldaps://ldapgw.comtarsia.com ldap_search_base = dc=comtarsia,dc=com ldap_id_use_start_tls = True ldap_tls_cacertdir = /etc/openldap/certs cache_credentials = True ldap_tls_reqcert = allow ldap_default_bind_dn = cn=admin,dc=comtarsia,dc=com ldap_default_authtok = PASSWORD
[sssd] services = nss, pam, autofs, sudo domains = default
[nss] homedir_substring = /home
Replace ldap_uri and ldap_search_base with your own values. Ldap_default_bind_dn and ldap_default_authtok are needed if LDAP searches for the users should not be done anonymously. Replace PASSWORD with the real password for the service account. If the ldap_uri starts with ldap://, STARTTLS will be used by the SSSD. Afterwards, set permissions to the file so that it is only read/writeable by root: sudo chmod 0600 /etc/sssd/sssd.conf and then restart the SSSD and verify that it is running correctly: systemctl restart sssd systemctl status sssd
Now the login can be tested, e.g. with ssh or GUI login.
5. RADIUS Gateway
6. REST API
The Web Management offers two types of REST APIs.
- A management API that allows to configure all product values and access all data that is shown in the Web Management web service.
- A user authentication and enrolment API that allows users to authenticate via the SignOn Proxy and to enroll to new OTP devices.
6.1 Technical information
The API server is implemented as an ASP.NET Core module and is able to run standalone with an embedded web server or can be hosted on an IIS instance. The API server for must be installed on the same computer as the Comtarsia SignOn Proxy. The API server shares its configuration with the SignOn Proxy, so information about the LDAP server, the account management and so on that is already configured for the SignOn Proxy will be automatically used. The API server has a few configuration parameters on its own, see the Web management API tab in the SignOn Proxy configuration profile in the Web Management, which is installed automatically together with the Comtarsia SignOn Proxy.
HTTPS Setup
If the API is hosted on the IIS, HTTPS setup is done in the IIS configuration as for any other IIS site. If the API server is running in standalone mode (using the embedded Kestrel web server), required certificates for the standalone web server for the HTTPS operation can be configured via the Comtarsia Web Management.
6.2 General API information
All API calls expect JSON data on the request and will also return JSON data as response. This means that the Accept and Content-Type headers should be set to “application/json”. The first call must always be the SignIn call, where the credential of the user are validated and a SessionIDs for further API calls is returned. SessionIDs are not interchangeable between the Enrollment API and the Mangement API. SessionIDs not used for a specific time span are automatically invalidated. The validity time span for enrolment and management sessions can be configured via the Management Console.
List of possible Result Codes
This is a list of possible codes that can be found in the result string of the response packet. The result code helps to quickly categorize the response as successful or in one of a few error categories. In many cases the errorMessage string provides further detailed information. The errorMessage string is designed that it can be displayed directly to the user. Result Code Description SUCCESS The API call finished successfully. ERROR A general error. The errorMessage string should provide further details. LDAP_ERROR The communication between SignOn Proxy and the LDAP/Active Directory server failed. SESSIONID An invalid or already expired SessionID was used. SOP_COMM The communication between the API server and the SignOn Proxy failed. SOP A general SignOn proxy error. The errorMessage string should provide further details. SOP_AUTH The SignOn Proxy was not able to successfully authenticate the user. This can be a wrong password, wrong or missing OTP and depending of the configuration, also a non-existing username.
List of SignOn Proxy Authentication error codes
This list describes the possible SignOn Proxy authentication error codes that can be found in the statusCode attribute of an user object returned by the listUsers call.
| statusCode (as Hex) | Description |
|---|---|
| 0 | Success |
| 1 | Error |
| 2 | Wrong user and/or password |
| 3 | Password expired |
| 4 | Password policy violation |
| 5 | UserID revoked |
| 6 | UserID undefined |
| 7 | No such object (If in case of an unknown user this code or code 2 is returned can be configured in the LDAP settings in the Management Console). |
| 14 | No unique user. (Multiple users with the same name exist in the directory.) |
| 18 | An MFA is required to logon but was not provided. |
| 1A | Communication error with the LDAP/AD server. |
Values of MFARequired and MFAUpdate
The attribute MFARequired (EnrollRequired in the Enrollment API) can have the following vales: A integer value that specifies if the user can or must enroll MFA. Possible values are 0 for No change or remove (controlled by the Update value), 1 for optional enrollment, 3 for immediate enrollment (no logon possible without enrollment) and values >= 10 specifie a time in seconds when the user must enroll. The attribute MFAUpdate (EnrollUpdate in the Enrollment API) can have the following vales: A integer that specifies if the user can update his current MFA enrollment. Possible values are 0 for no update, 1 for an optional update, 3 for immediate update and values >= 10 specifies a time in seconds when the user must update.
6.3 Enrollment API
The Enrollment API provides an interface to the Comtarsia SignOn Solutions MFA User Self Enrollment. The SignOn Solutions support different MFA technologies like TOTP, HOTP, COTP (Comtarsia Push OTP), FIDO2, BitKey and Smart Cards. The API based user self enrollment is currently only available for TOTP and HOTP. More MFA technologies will be added in future builds. The enrollment process for TOTP and HOTP is implemented as a three step process. In the first step, the user is authenticated to the API with his current login method (e.g. user and password only). As response to a successful authentication, the API server provides information about current enrolled MFA technologies as well as information if the user can or must enroll for MFA. This information can be displayed to the user and if the users chooses to enroll, the API server provides a QR code which can be scanned by the user with a standard TOTP/HOTP authenticator. Be reminded that not all authenticators support all different algorithms that the SignOn Solution MFA server supports, e.g. the Google Authenticator currently only supports SHA1 hashes. After the user scanned the QR code, the OTP must be send back to the API server. If the OTP is successfully validated, OTP is then enabled as a second login factor for the user and must be used on all subsequent logins. Depending on the MFA management profile, the enrollment API can also be used to remove the OTP requirement from the user account.
6.4 Management API
The Management API can be used to query and set all MFA related values. The Management API does not support direct user management actions like creating user accounts. This must be done on the usual way, e.g. using LDAP or Active Directory APIs. The Comtarsia MFA server supports different sources for the MFA information, LDAP (AD) or a local database. When using the Management API, the client application does not need to deal with the differences, for every source the queries are the same. The Comtarsia MFA solution defines MFA information in so called management profiles. This can be an attribute of an LDAP group that stores a MFA policy which describes the MFA type assigned, algorithms to use and much more. If a user is then assigned to this group, the MFA policy is automatically enforced for this user. The MFA policy is stored in the LDAP attribute as readable attribute/value pairs, but it should only be edited via the Management API, not directly. This is to ensures compatibility with future updates. The MFA enrollment information for a user is stored in a similar way in an LDAP attribute of the user object. This attribute should also be only edited via the Management API and never directly in the attribute. To get a practical first impression on what can be done with the Management API, take a look at the Comtarsia User Management application and the Comtarsia Web Management JavaScript based Web application, that both only use the functions provided by this API for MFA management.